我年轻需要指点
首先得有源码
通过 CDN 获得 React 和 ReactDOM 的 UMD 版本。1
2<script crossorigin src="https://unpkg.com/react@16/umd/react.development.js"></script>
<script crossorigin src="https://unpkg.com/react-dom@16/umd/react-dom.development.js"></script>
上述版本仅用于开发环境,不适合用于生产环境。React 的压缩和优化之后的生产环境版本链接如下:1
2<script crossorigin src="https://unpkg.com/react@16/umd/react.production.min.js"></script>
<script crossorigin src="https://unpkg.com/react-dom@16/umd/react-dom.production.min.js"></script>
如果需要加载指定版本的 react 和 react-dom,可以把 16 替换成需要加载的版本号。react16完全重写了核心代码,但是对于使用者来说是毫无感知的,不像vue和ng一样大版本更新的时候需要
调整兼容,react16还引入了fiber概念,从根本上解决js单线程运行当数据流量大动画卡帧的问题。
1、JSX代码转变到javascript之createElement
1 | React.createElement('div',{ |
如果是组件1
2
3
4
5
6
7
8function Hardy(){
return <a>hardy</a>
}
<Hardy id='hardyid'>
<span>1</span>
<span>2></span>
</Hardy>
那么createElement的第一项就不是字符串了,而是当成变量去传1
2
3
4
5
6
7
8
9;
function Hardy() {
return React.createElement("a", null, "hardy");
}
React.createElement(Hardy, {
id: "hardyid"
}, React.createElement("span", null, "1"), React.createElement("span", null, "2>"));
如果自定义的这个组件叫hardy的话,它会被认为是原生dom里面的标签。在执行的时候就会报错,所以在声明自定义组件的时候,首字母一定要大写,这是一个规范.
2、react-Element
在react中createElement这个方法是这么实现的,它传入3个参数1
2
3
4
5
6
7
8
9
10
11
12
13
14
15
16
17
18
19
20
21
22
23
24
25
26
27
28
29
30
31
32
33
34
35
36
37
38
39
40
41
42
43
44
45
46
47
48
49
50
51
52
53
54
55
56
57
58
59
60
61
62
63
64
65
66
67
68
69function createElement(type, config, children) {
var propName = void 0;
// Reserved names are extracted
var props = {};
var key = null;
var ref = null;
var self = null;
var source = null;
if (config != null) {
 if (hasValidRef(config)) {
    ref = config.ref;
}
if (hasValidKey(config)) {
    key = '' + config.key;
}
self = config.__self === undefined ? null : config.__self;
source = config.__source === undefined ? null : config.__source;
// Remaining properties are added to a new props object
for (propName in config) {
    if (hasOwnProperty$1.call(config, propName) && !RESERVED_PROPS.hasOwnProperty(propName)) {
        props[propName] = config[propName];
    }
}
}
// Children can be more than one argument, and those are transferred onto
// the newly allocated props object.
var childrenLength = arguments.length - 2;
  if (childrenLength === 1) {
    props.children = children;
  } else if (childrenLength > 1) {
    var childArray = Array(childrenLength);
    for (var i = 0; i < childrenLength; i++) {
      childArray[i] = arguments[i + 2];
    }
    {
      if (Object.freeze) {
        Object.freeze(childArray);
      }
    }
    props.children = childArray;
  }
// Resolve default props
if (type && type.defaultProps) {
var defaultProps = type.defaultProps;
for (propName in defaultProps) {
if (props[propName] === undefined) {
props[propName] = defaultProps[propName];
}
}
}
{
if (key || ref) {
var displayName = typeof type === 'function' ? type.displayName || type.name || 'Unknown' : type;
if (key) {
defineKeyPropWarningGetter(props, displayName);
}
if (ref) {
defineRefPropWarningGetter(props, displayName);
}
}
}
return ReactElement(type, key, ref, self, source, ReactCurrentOwner.current, props);
}
3个参数中的type,就是节点类型,如果是原生节点是字符串,如果是自定义组件就是class component 或者function component,或者react的组件Fragment、StricMode、Suspense,config是写在标签上的所有attr,它们都会变成keyvalue的形式存到config对象里面,我们需要从config里面筛选出props的内容或者href这种特殊的attr,children是标签中放的内容,可以是子标签或者文字,过程就是判断有没有合理的ref,有没有合理的key1
2
3
4
5
6 if (hasValidRef(config)) {
ref = config.ref;
}
if (hasValidKey(config)) {
key = '' + config.key;
}
然后就是对props进行处理,将不是内嵌的props另存到一个新的对象1
2
3
4
5for (propName in config) {
if (hasOwnProperty$1.call(config, propName) && !RESERVED_PROPS.hasOwnProperty(propName)) {
props[propName] = config[propName];
}
}
内嵌的也就是RESERVED_PROPS中做了这样的声明1
2
3
4
5
6const RESERVED_PROPS={
key:true,
ref:true,
__self:true,
__soure:true
}
这里面的属性都不会出现在比如react项目中组件通信的时候的this.props中,然后是处理children1
2
3
4
5
6
7
8
9
10
11
12
13
14
15var childrenLength = arguments.length - 2;
if (childrenLength === 1) {
props.children = children;
} else if (childrenLength > 1) {
var childArray = Array(childrenLength);
for (var i = 0; i < childrenLength; i++) {
childArray[i] = arguments[i + 2];
}
{
if (Object.freeze) {
Object.freeze(childArray);
}
}
props.children = childArray;
}
children是可以有多个的,在一个节点上可能有很多兄弟节点,createElement(type, config, children),
默认是可以传入3个参数,但是实际上我们可以传入很多个,第三个参数之后的参数都认为是一个children,所以arguments.length-2就等于接下来的这些参数都是children,接着将这些children
存到新声明的数组childArray,最终它再放到props.children里面,通过this.props.children就可以拿到;接着是对默认props的处理,比如在写一个自己的组件的时候可以加上这么个值,这样
如果给别人用的时候,他没有传入这个值,就默认是设置的默认值。1
2
3
4
5
6
7
8
9
10
11
12
13impoert React,{ Component } from 'react'
Hardy.defaultProps={ name:hardy }
class Hardy extends Component{
}
if (type && type.defaultProps) {
var defaultProps = type.defaultProps;
for (propName in defaultProps) {
//如果==就代表null和undefined都需要设置默认值,===就表示即使是null也不需要设置默认值
if (props[propName] === undefined) {
props[propName] = defaultProps[propName];
}
}
}
到这里的时候,预处理的内容已经完成了,然后它return了一个ReactElement,并传入上面处理的那些内容,return ReactElement(type, key, ref, self, source,
ReactCurrentOwner.current, props);ReactElement在第1881行的时候做了这样的声明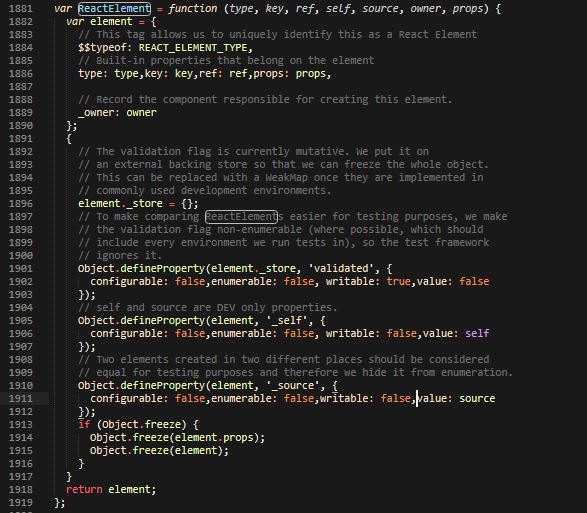
ReactElement最终return一个这样的Object1
2
3
4
5
6
7
8
9
10
11
12
13
14var element = {
// This tag allows us to uniquely identify this as a React Element
$$typeof: REACT_ELEMENT_TYPE,
// Built-in properties that belong on the element
type: type,
key: key,
ref: ref,
props: props,
// Record the component responsible for creating this element.
_owner: owner
};
$$typeof是REACT_ELEMENT_TYPE,用来标识Element是什么类型的,type是传进来的type,key是处理过的key,ref就是ref,props就是props,_owner就是_owner
3、react-Component
Component就是组件
一般1
2import React,{ Component } from 'react
class hardy extends Component{}
或者1
2import React from 'react'
class hardy extends React.Component{}
hardy都是去继承React的Component的base Class,其实React中有Component和PureComponent,两者唯一的区别就是PureComponent保证了组件在没有任何变化的情况下能够减少不必要的更新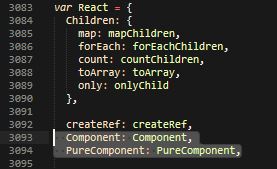
Component: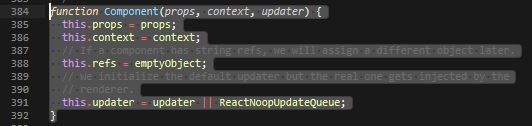
Component被声明成了一个函数,接收3个参数props, context, updater,this.props和this.context是可以直接用的,emptyObject是我们获取的节点的实例然后挂载在this.refs上1
2
3
4var emptyObject = {};
{
Object.freeze(emptyObject);
}
接下来第421行代码,Component的原型上挂载了一个setState,这是使用频率最多的api,它是用来更新组件状态的,partialState是要更新的新的state,可以是对象,也可以是个方法,callba
ck是更新完之后执行的方法,this.setState主要的部分是this.updater.enqueueSetState,也就是调用this.setState的时候初始化调用Component的时候传入的updater对象上面的enqueueS
etState方法,enqueueSetState在reactDom里面实现1
2
3
4Component.prototype.setState = function (partialState, callback) {
!(typeof partialState === 'object' || typeof partialState === 'function' || partialState == null) ? invariant(false, 'setState(...): takes an object of state variables to update or a function which returns an object of state variables.') : void 0;
this.updater.enqueueSetState(this, partialState, callback, 'setState');
};
Component上面还有个方法叫forceUpdate,作用就是强制react的state更新1
2
3Component.prototype.forceUpdate = function (callback) {
this.updater.enqueueForceUpdate(this, callback, 'forceUpdate');
};
Component的内容就是这些了,确实内容还是蛮少
4、PureComponent:
PureComponent继承自Component,区别就是加了isReactComponent=true,通过这个来标识继承自Component的是PureComponent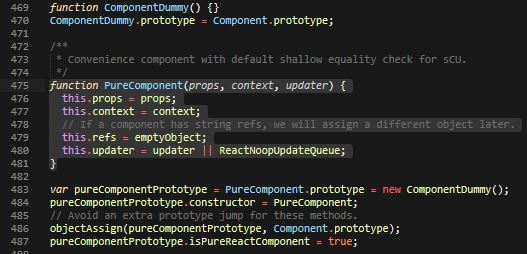
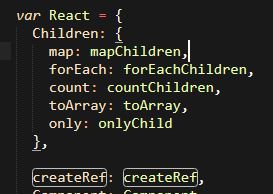
5、react-ref的三种方式
1 | constructor(){ |
1、string ref
想要获取节点的元素的props上添加一个ref属性,然后传入字符串,然后在完成这个节点的渲染之后在this.refs上面挂载这个属性的key,如果是节点就是节点,如果是组件就是组件,对应的就是
这个节点的实例的对象(将要被废弃的使用方式)
2、function
ref传入一个方法,方法接收一个参数,参数就是当前的实例,如果是节点就是节点,如果是组件就是组件
(this.methodsRef=ele)}>
3、createRef
这个是react提供的api,利用this.objRef=React.createRef()创建了一个null的current对象,然后传给某个节点,传完之后在组件渲染完成之后,将对应的节点挂载到current上
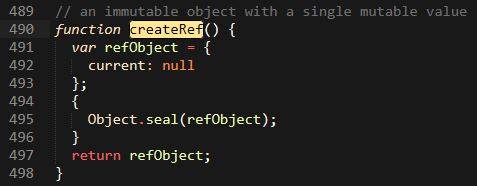
Object.seal()方法封闭一个对象,阻止添加新属性并将所有现有属性标记为不可配置。当前属性的值只要可写就可以改变。
6、forwardRef
之前从上层组件传到子组件的方式只有props,forwardRef可以传入第二个参数1
2
3
4
5
6
7
8
9
10
11
12
13
14
15
16
17const Childcom=React.forwardRef((props,ref)=>{
<input type="text" ref={ref}>
})
export default Com extends React.Component{
constructor(){
super()
this.creaRef=React.createRef()
}
componentDidMount(){
this.ref.current.value="hardy forwardRef"
}
render(){
return (
<Childcom ref={this.ref}></Childcom>
)
}
}
在react中forwardRef的实现1
2
3
4
5
6
7
8
9
10
11
12
13
14
15
16
17
18
19
20
21function forwardRef(render) {
{
if (render != null && render.$$typeof === REACT_MEMO_TYPE) {
warningWithoutStack$1(false, 'forwardRef requires a render function but received a `memo` ' + 'component. Instead of forwardRef(memo(...)), use ' + 'memo(forwardRef(...)).');
} else if (typeof render !== 'function') {
warningWithoutStack$1(false, 'forwardRef requires a render function but was given %s.', render === null ? 'null' : typeof render);
} else {
!(
// Do not warn for 0 arguments because it could be due to usage of the 'arguments' object
render.length === 0 || render.length === 2) ? warningWithoutStack$1(false, 'forwardRef render functions accept exactly two parameters: props and ref. %s', render.length === 1 ? 'Did you forget to use the ref parameter?' : 'Any additional parameter will be undefined.') : void 0;
}
if (render != null) {
!(render.defaultProps == null && render.propTypes == null) ? warningWithoutStack$1(false, 'forwardRef render functions do not support propTypes or defaultProps. ' + 'Did you accidentally pass a React component?') : void 0;
}
}
return {
$$typeof: REACT_FORWARD_REF_TYPE,
render: render
};
}
7、context
react中组件组件通信用props,多层组件通信的时候中间隔着不同的组件,这时候用context,父组件设置了一个context,其所有的子组件都可以通过context访问到
context的实现方式有两种
1、childContextTypes(即将被废弃)
2、createContext(re16提供的)
关系1
2
3
4
5
6export default ()=>{
<Parent>
<Child/>
<Child/>
</Parent>
}
父组件1
2
3
4
5
6
7
8
9
10
11
12
13
14class Parent extends React.Component{
constructor(){
super()
this.state={
ChildContext:"hardy"
}
}
getChildContext(){
return {value:this.state.ChildContext}
}
}
Parent.childContextTypes={
value:PropTypes.string //和PropTypes一样,如果不声明是无法获取到的,
}
子组件1
2
3
4
5
6
7
8Child.contextTypes={
value:PropTypes.string
}
class Child extends React.Component{
render(){
return (<p>{this.context.value}</p>)
}
}
上面那是老的context用法 ,接下来是新的api1
const { Provider,Consumer } =React.createContext('default')
Provider和Consumer分别是context的提供方和订阅方,在Parent直接1
<Provider value={this.state.newContext}></Provider>
然后在Child这边需要用到的地方直接,Consumer,在父组件定义了context之后,子组件的哪个地方需要用到这个context就可以直接用这个组件就可以了1
<Consumer>{value=><p>newContext:{value}</p>}</Consumer>
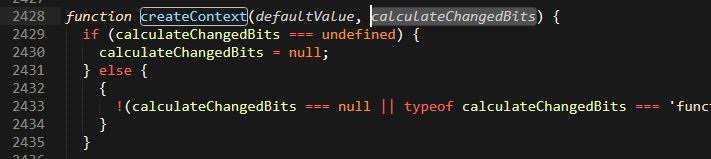
createContext接收两个参数,一个是defaultValue,另一个calculateChangedBits用来计算新老API变化的,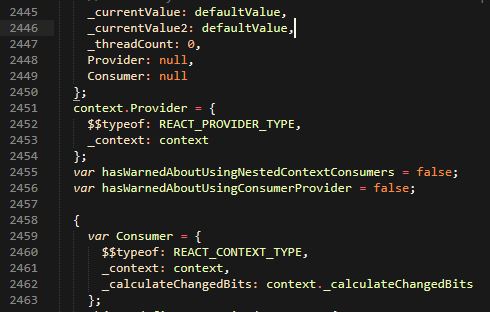
_currentValue: defaultValue,_currentValue2: defaultValue是用来更新最新的defaultValue值
8、ConCurrentMode(re16之后)
ConCurrentMode(本叫assignMode)16.6之后名字更新,作用是让react的渲染过程进行优先的排比,并且能让整体的渲染过程中断,它可以进行任务调度,把更多的cpu性能(javascript是单线
程语言,如果react的某个更新渲染占用了非常长的进程,会导致动画卡顿或者其他的一些响应变卡,因为这时候js正在运行react的更新,这时候react可以有选择的优先进行优先级更高的任务,比
如一个人在游泳,他一次要游到水底再上来,如果他中间岸上有人有更重要的事情找他,但是只能等他先游上来才能继续,但是这个就提供了每隔一段时间会看一下是否有更重要的事情然后先做。)
ConCurrentMode有个特性,在ConCurrentMode子树中渲染了ConCurrentMode之后,它下面所有节点的更新就是低优先级的更新
react16.6已经可以使用一部分功能的新的react filter
Suspense:1
2
3
4
5
6
7
8
9function SuspenseComp(){
const data=requestData()
return <p>{data}</p>
}
export default ()=>{
<Suspense fallback="loading">
<SuspenseComp/> //SuspenseComp中的data还没有的时候显示loading
</Suspense>
}
这个api目前在正式的项目不建议用,可以先用lazy(lazy.js)1
2
3
4
5import React from 'react'
export default ()=> return <p>lazy comp</p>
import React,{ lazy } from 'react'
const lazyComp=lazy(()=>{import(./lazy.js)})
这个就是用了webpack的异步加载的api,看源码之后发现Suspense也是个symbol
lazy函数接收一个方法,ctor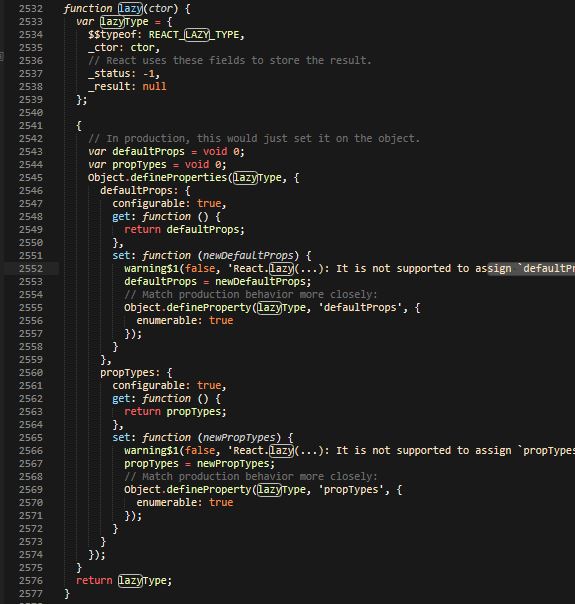
_status用来记录状态
_result用来记录promise对象返回之后的属性,最终resolve出来的会放在_result上面
9、hooks
要安装hooks必须要react&&react-dom16.7以上,如果没有16.7.0,可以安装react16.7.0-alpha.2&&react-dom16.7.0-alpha.2,如果已经有了直接安装最新版1
2
3
4
5
6
7
8
9
10import React,{ useState } from 'react'
export default ()=>{
const [name,setname]=useState('hardy')
return (
<>
<p>my name is:{name}</p>
<input type="text" value={name} onChange={e=>setName(e.target.value)}></input>
</>
)
}
这是一个函数组件,和class组件的区别就是没有this对象,没有this就没有this.state,也没有生命周期方法,这个demo用hooks来给组件存储state,给useState传入一个默认值,然后返回一个
数组,再解构。name是变量,setname是改变变量的方法.
react中的diff算法
虚拟dom中的diff算法
1、state
2、jsx模板
3、数据+模板 生成虚拟dom(虚拟dom就是一个js对象,用它来描述真实dom)(损耗了性能)1
['div',{id:'abc'},['span',{},'helloword']]
4、用虚拟dom的结构生成真实的dom,来显示1
<div id='abc'><span>hello word</span></div>
5、state 发生变化
6、数据+模板 生成新的虚拟dom (提升性能)1
['div',{id:'abc'},['span',{},'bye bye']]
7、比较原始虚拟dom和新的虚拟dom的区别,找到区别是span中的内容(提升性能)
8、直接操作dom,改变span中的内容
优点:
性能提升
使得跨端应用得以实现(比如react native)
待续….